因為買了即溶榛果咖啡粉,就用它來做戚風蛋糕吧!沒想到小孩還挺捧場的!
2021年12月28日 星期二
2021年12月27日 星期一
酪梨蔓越莓蛋糕
【今日材料】
乾料:
- 中筋麵粉:225g
- Lecker's baking powder:10g
- 鹽:1/4t
- 本和香糖:42g
- 海藻糖:48g
濕料:
- 熟酪梨:400 g
- 融化奶油:90g
- 全蛋:1 個
餡料:
- 蔓越莓乾:75g
2021年12月20日 星期一
2021年8月30日 星期一
溫度對冷製皂的影響
以下文章取自:
Cold process soap making is a science. It involves mixing oils and lye solution to begin a chemical reaction known as saponification. Like any scientific process and reaction, it’s important to be precise and consistent. For soap making, these means carefully measuring and mixing ingredients and controlling for factors such as temperature.
The temperature of cold process ingredients (the oils and lye solution) can greatly affect the final product. The temperature of your soaping area also affects your results. If you were to ask advanced soapers, “What is the perfect soaping temperature?” you would receive a wide range of answers. This is because it depends greatly on the particular recipe and design. For most soapers, the preferred temperature of soaping lye and oils are 120-130 ° F. In addition, many soapers and books believe it is helpful to have the lye and oil within 10 degrees of each other.
The temperature range of 120-130 ° F is popular for several reasons. For any recipe, it’s important that your soap making oils are completely melted. Oils and butters all melt at different temperatures, but at 120-130 ° F, the mixture of oils (and possibly butters) will all be thoroughly melted. A good rule of thumb is that your mixture of oils should be clear, with no cloudiness.
If the oil mixture is too cool and has cloudiness, fatty acids within the mixture have solidified. Solid oil within the mixture can lead to a “false trace.” False trace occurs when soap batter appears to be a thick consistency, but the oils and butters have not saponified. To avoid false trace, ensure any hard oils or butters are thoroughly melted and do not cool during the soaping process. The temperature range of 120-130 ° F is a safe range that should not look cloudy, or lead to false trace.
It’s also important that your lye is an appropriate soaping temperature. Just like soaping oils, a great lye temperature for soaping is 120-130 ° F. Adding lye to water causes a exothermic reaction that causes the lye water to reach temperatures up to 200 ° F. Because the lye solution becomes so hot, it needs time to cool for soaping. I like to prepare my lye water about 1-3 hours before soaping to allow my lye to cool to a suitable temperature.
If the lye solution is too cold, it can solidify the oils and butters upon contact. If the lye is extremely hot, it can cause the saponification process to speed up dramatically. This is problematic if the soap design involves lots of layers, swirls or other complex techniques.
All this being said…soaping temperature is very much a personal preference, and will vary slightly depending on the recipe. Milk soap is a great example. To prevent the milk from scorching, lye temperatures need to be kept cool. Learn more about making lye solution with milk instead of water in this blog post. On the flip side, hotter temperatures are great when you want your soap to go through gel phase. Learn more about gel phase here. Below are some reasons why you may want to soap hotter or colder than 120-130 ° F. In general, I only recommend soaping at 160 ° F if you are working with beeswax.
When to Keep Soaping Temperatures Cool (100-110 ° F):
You want to prevent gel phase
You are making soap with alternative liquids (milk, juice, tea, etc) instead of water
You want to prevent glycerin rivers
When working with a fragrance oil that heats up
Your room temperature is hot
When to Keep Soaping Temperatures Hot (131-160 ° F):
You want to promote gel phase
If you’re using LabColors (promote gel phase)
You want to prevent soda ash
To help soap saponify quicker
You are working with beeswax
It’s important to also consider the temperature of your surroundings when making soap. Soap created with average or cool soaping temperatures can become quite hot if left in a warm or hot room after pouring into the mold. Hot room temperatures can cause soap to go through gel phase, or even overheat. If your room temperature is quite hot you may want to soap with slightly cooler temperatures than normal and avoid insulation. To learn more about insulating your soap, check out the When to Insulate Handmade Soap blog post. On the flip side, some soap recipes like milk soap can be placed in the fridge or freezer to prevent gel phase or overheating. Check out the Milk Project Roundup for a variety of recipes made with milk.
When creating cold process soap, I always have a temperature gun nearby to make sure my temperatures are appropriate. Temperature is key to ensuring the recipe sets up correctly, and the design turns out as planned. Remeber, if your soap overheats or is cold as it saponifies in the mold, as long as it is not lye heavy, the soap is safe to use. Below are the most common cosmetic concerns that are due to soap becoming too hot, or the soap being cold.
When soap is too hot: When soap becomes hot, it enters gel phase. Gel phase is great! It helps colors become more vibrant. But, if the soap gets too hot, it can form alien brains, glycerin rivers or volcano. In the collage below, “alien brain” is shown on the top. Notice the bumpy, wavy temperature? That is alien brain! This was caused by the soap being insulated in a hot room.
On the bottom left is a soap volcano. This soap overheated due to a combination of hot oils, coconut milk and a untested fragrance oil. Click here to read more about this incident. Luckily I was able to save this batch by using the hot process hero method. On the bottom right is an example of glycerin rivers. When cold process soap gets too hot the naturally occurring glycerin within the soap can congeal, becoming more apparent and visible, forming the “rivers.” Click here to learn more about glycerin rivers and how to prevent them.
When soap is too cold: When soap is on the cooler side, soda ash can form on the top of the soap. Soda ash occurs on soap due to the natural process of unsaponified lye reacting with carbon dioxide in the air. The result is a thin white layer on the top of the soap. While perfectly safe to use, soda ash can be considered an aesthetic issue. To learn more about soda ash and how to prevent it, click here.
2021年8月25日 星期三
22.5% Laurel Fruit Oil Soap
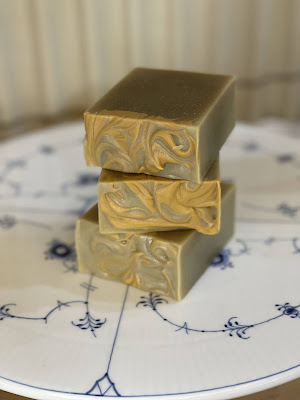
這次買的月桂果油剩下 180g,有較多的沈澱物,做了這款含 22.5% 月桂果油皂,因為有較多的月桂果沈澱物,所以顏色比較深,有古樸感。約 300g 皂糊加入 5g 金粉做變化。這個瘦高模做出來的皂挺好看的。
2021年8月24日 星期二
2021年8月23日 星期一
2021年8月13日 星期五
2021年8月12日 星期四
Cedarwood & Baking Soda Soap Recipe for Cleansing & Deodorizing Skin
https://soapdelinews.com/2014/01/diy-handmade-cedarwood-baking-soda-soap-recipe.html#google_vignette
Normally, it’s not advisable to use a 0% superfat when making soap. That is, of course, unless you’re making a 100% coconut oil soap for use as a laundry stain remover or a solid dish soap. This is because it leaves room for error when making the soap. There’s the potential for your soap recipe to end up lye heavy if mistakes are made. Therefore, you’ll normally see most cold process soap recipes with a superfat of at least 5%. Superfat not only compensates in the case of error, however. It also gives the bar more skin conditioning properties. This is because superfatting soap allows extra oils in the final soap bars to remain unsaponified.
Baking soda reverses the saponification process to some extent. Therefore, despite using a 0% superfatted soap recipe with baking soda, the resulting soap will in fact have some superfat as a result. Even without adding it in. If you’re formulating your own baking soda soap recipe using the cold process soap making method, I recommend a recipe that creates a hard bar, with a higher cleansing percentage. You should also discount the water to at least 30% (or less) of the oil weight. And, more importantly, always add the baking soda once you reach trace. Never before. Otherwise, you run a high risk of a failed batch.
Cedarwood & Baking Soda Soap Recipe
Yield: 47.3 oz. (1,342.12 grams) before the cure
Ingredients:
3.2 oz. / 90.72 grams Castor Oil (10%)
6.4 oz. / 181.44 grams Cocoa Butter (20%)
8.95 oz. / 253.73 grams 76° Melt Point Coconut Oil (27.97%)
9.3 oz. / 263.65 grams Pomace Olive Oil (29.06%)
4.15 oz. / 117.65 grams Sunflower Oil (12.97%)
9.6 fl. oz. / 272.16 grams distilled water (30% of oil weight)
4.74 oz. / 134.43 grams lye/sodium hydroxide (0% superfat)
2 oz. baking soda
2 teaspoons white kaolin clay
1 teaspoon walnut shell powder, or to suit
1/16 teaspoon woodland green pigment powder
1 oz. / 28.35 grams cedarwood essential oil (3.13% of oil weight)
Baking Soda Soap Recipe Making Notes:
It’s important to note that 3.13% is the suggested maximum, skin safe usage rate for cedarwood essential oil in a soap recipe. Therefore it is important, should you make changes, not to increase this amount when making my baking soda soap recipe. (You can learn more about the maximum usage rate of popular essential oils in soap here.)
My baking soda soap recipe will fit inside this silicone loaf mold or another similar mold. You can also use two sets of silicone molds with individual cavities. However, you won’t be able to pull off the pencils lines without using a loaf mold.
Follow basic cold process soap making instructions to make my cold process baking soda soap recipe. You should make sure you are not using any utensils or equipment that contain aluminum. All containers should be heat safe. In addition, take all safety precautions including wearing protective clothing (long sleeves), gloves and goggles.
Instructions:
Prepare the lye-water solution first. To do this, weigh out the lye into a heat safe container. Then measure out the distilled water into separate heat safe container, such as a heat safe pitcher.
Slowly pour the lye into the water. Then stir until the lye dissolves completely. Set the lye-water aside to cool.
Now, use a digital scale to weigh the olive, castor, coconut, and sunflower oils, as well as the cocoa butter. Combine these soap making fats in a stainless steel pot. Then heat on the stovetop over medium to medium-low heat until all oils have melted. Once fully melted, remove from heat.
In the meantime, weigh out the baking soda, clay and the cedarwood essential oil into separate containers. Measure out the walnut shell powder and pigment powder. Set aside.
Once the lye-water and melted soap making oils reach about 100° F, you’re ready to mix the soap batter.
Start by adding the kaolin clay to the melted soap making oils. Mix into clay into the oils using a stick blender.
Once the clay is fully incorporated into the oils, slowly pour the lye-water into the oils. Mix the lye-water and oils together with a stick blender until you reach a light trace trace. Then stir in both the cedarwood essential oil and the baking soda. Mix to combine.
Now pour roughly one third of the soap into the loaf mold. Smooth the soap out in the mold using a spatula. Then lightly dust the soap in the mold with walnut shell powder so that the entire surface is covered.
Once you’ve added the walnut shell powder, add the green pigment powder to the remaining soap in the pot. Mix well using the stick blender.
Finally, pour the remaining soap batter from the pot into the mold over the walnut shell powder and the first layer of soap. Even out the soap using the spatula. If desired, cover and insulate for 24 hours.
Unmold the baking soda soap 24 to 36 hours later. Then cut the soap into bars. Allow the baking soda soap bars to cure a minimum of four weeks prior to use, for best results. (Cold process soaps will fully saponify within about 72 hours. However, a full cure not only makes the soap harder, but also increases the lather and final performance of the soap.)
Tip: For a harder soap with a lower superfat, reduce the amount of baking soda called for in the recipe to 1 oz.
2021年8月11日 星期三
Baking Soda Soap
再一次嘗試加入蘇打粉的冷製皂。參考部落格:https://soapdelinews.com
蘇打粉量約 6%,打到 trace 時加入,為了使蘇打粉更細緻,先用水混合:21g baking soda+10g distill water (deduct from the water used in lye). Trace 後加入精油,攪拌,再加入蘇打粉水,繼續攪拌至更稠,然後入模。
2021年8月8日 星期日
2021年8月6日 星期五
酸種歐包_88%_Nº30_抹茶巧克力_分佈改良
今日還是練包餡:我希望內圈中度分佈,中圈多一些,外圈最少。 成果分佈還可以接受,因為在 coil fold 時有拉扯了一下。 🍃 抹茶巧克力酸種麵包 ① 今日 配方 總粉 200g(含酵種粉) 酵種(22.5%)→ 使用 45g 我的酵種是 80% hydration: 粉 2...


