2020年3月10日 星期二

伯爵紅茶磅蛋糕 Earl Grey Pound Cake


【今日材料/Today's Ingredients
  1. 全蛋(室溫)/Egg (room temperature):2 顆(92g)
  2. 低筋麵粉 80g + 伯爵紅茶粉 10g/Cake flour 80g + Earl Grey Powder 10g
  3. 無鋁泡打粉/Baking powder:1/8t (可省略/Optional
  4. 無鹽奶油(室溫)/Unsalted butter (room temperature):90g
  5. 糖(海藻糖50g + 本和香糖20g)/Sugar:70g

【作法/StepsKitchenAid 5Q Stand Mixer/Whip attachment
  1. 軟化的奶油先打發,顏色變淡。我是用KA攪拌機。Beat the butter until it is creamy and smooth.
  2. 糖分兩次加入,繼續打。Add the sugar. Beat until the ingredients are well combined. 
  3. 全蛋液 1T、1T 加入,每加入一次要打到完全吸收再加入另一匙。Beat the eggs and add egg liquid 1T at a time into the batter. Whip the mixture on low speed till the ingredients are well combined, then add another 1T of egg liquid. Repeat till egg liquid is all added.
  4. 麵粉分次加入,拌勻。Add 1/3 of flour and use spatula to incorporate flour and batter. Repeat till all the flour is added.
  5. 入模。Spread the batter evenly into a tube pan. Smooth the surface.
  6. 表面撒上杏仁角及糖粒。Decorate the topping with almond chips and sugar.
  7. 放入烤箱。 Transfer to oven.


【烤程/Oven Settings】Miele 6260,上下火功能,層 2/Miele 6260, Top & down heating, Shelf 2
  1. 180 度烤 35 分鐘左右。Preheat the oven to 180℃. Bake for around 35 mins.


*取出後,我先包一層烤盤紙,再用保鮮膜包住,放涼,這樣可以讓蛋糕濕潤。


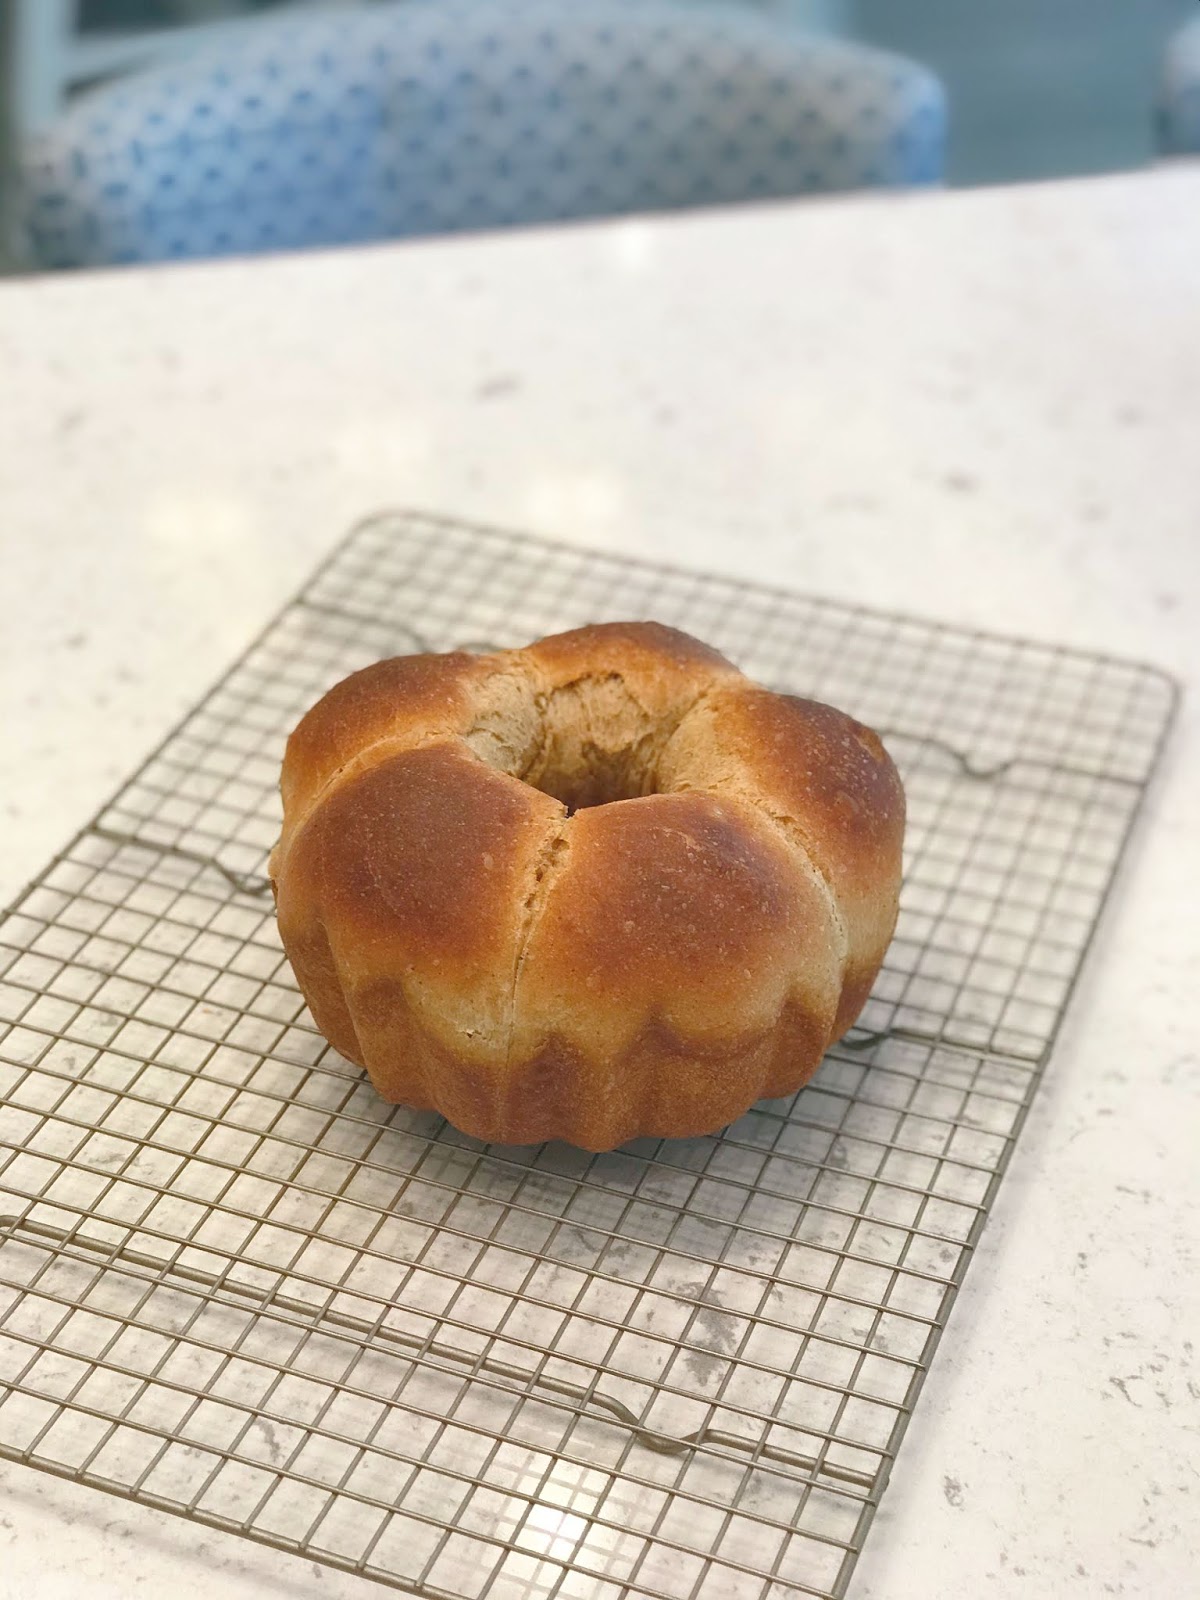
巧克力花形麵包 Chocolate Buns


今日材料 / Today's Ingredients
  1. 高筋麵粉 / Bread Flour:220g
  2. 速發乾酵母 / Instant Yeast:2.5g
  3. 上赤糖琥珀 / Sugar:16g 
  4. 肉桂粉 / Cinnamon powder:3t
  5. 蛋/Egg:1 個
  6. 鮮奶 / Milk:95g+ 
  7. 鹽 / Salt:4g
  8. 無鹽奶油 / Unsalted butter:16g
  9. 巧克力豆 / Chocolate chips:3T


【作法】KitchenAid 7Q Stand Mixer
  1. 材料 1~6 以低速攪拌,快成糰時,加入鹽。Mix ingredients 1~6 on low speed. While the dough is nearly formed, add salt.
  2. 在麵糰有些粗糙時,便可加入小塊小塊的奶油丁,分次加入,每次讓麵糰完全與奶油融合後,再加入奶油。Mix for another couple of minutes. When the dough looks rough, add butter cubes one at a time. After the dough and the butter are incorporated together, add the next butter cube.
  3. 打至撐出薄膜。
  4. If you are unsure if the dough has been kneaded enough, you can do the "windowpane" test. Remove a small bit of dough (about the size of a golf ball) and hold it between your thumb and first two fingers of each hand so the dough is in front of you. Then, gently pull your fingers and thumbs away from each other to stretch out the dough. If the dough doesn't break, it means you have kneaded it enough; if the membrane pulls apart, you need to knead it a bit more. (from: https://www.thespruceeats.com/kneading-dough-bread-baking-for-beginners-427562)
  5. 加入巧克力豆,慢速拌勻。Add chocolate chips and mix well by low speed.
  6. 滾圓,放入容器,進行第一次發酵,約2小時。 Round the dough and put it in a bowl. Cover with a wet towel. First rise till double in size.
  7. 取出第一次發酵完成的麵糰,分成 6 等份,滾圓,鬆弛 10 分鐘。Divide the dough into 6 equal portions. Round the dough, cover with a wet towel, and let it rest for 10 mins.
  8. 鬆弛後,每一份再滾圓,放入模具,六份都這樣做。進行第二次發酵,約30分鐘。After 10 mins, round every dough again and put it in the mold. Continue doing this for the rest of the dough. Then put the mold in wet and warm place to rise for 30 mins.
  9. 烤箱預熱至210度C,約烤18分鐘。Preheat the oven to 210℃, bake for about 18 mins.

【烤程 / Baking Settings】  Miele 6260, Shelf 2
  1. 上下火預熱至 210 度C。Function: {Top/bottom heating}, preheat the oven to 210℃.
  2. 放層2。Put the mold on shelf 2.
  3. 10分鐘時先檢查麵包表面是否上色夠了,如夠了就蓋上鋁箔紙續烤。Around 10 mins, check the surface of the bread to see if it darkens enough. If it's already dark, cover the bread with foil and continue to bake.


2020年3月8日 星期日

天然酵母之檸檬酵種小圓法 Lemon Starter French Rolls


終於把我的 Miele 6260 烤箱搬到新的地方。試到現在,唯有 Miele 這個嵌入式烤箱的加濕功能可以把法國麵包烤得令人滿意!


皮薄內Q,一口咬下馬上回彈!

雖憲劃得不盡人意,但看它的形狀就知道是成功的!


【今日材料 / Today's Ingredients
  1. 山茶花高筋麵粉/Bread flour:150g
  2. 檸檬酵種/Lemon starter :70% of total bread flour = 105g (欲知如何培養請連結:【檸檬酵母液之培養】


  3. 檸檬酵母液 / Lemon starter liquid:3T (This is the liquid before adding flour)
  4. 上白糖/Sugar:17g(上白糖不會搶了檸檬酵母的風味)
  5. 鹽 / Salt:3.5g
  6. 水:看麵糰打的情況添加。Water added as needed. This needs experience.


【作法 / StepsKitchenAid 7Q Stand Mixer / Dough Hook
  1. 將材料 1~4 放入攪拌缸中先以低速(2)攪拌,約1~2 分鐘時,加入鹽。看麵糰情況慢慢加入水量,至麵糰濕黏。Put ingredients 1~4 in the bowl. Start mixing by low speed (2). After 1~2 mins, add salt. Then start to add water little by little till the dough is wet and sticky.
  2. 停機,蓋上濕布,自我水解 20 分鐘。Stop the machine. Cover the bowl with a wet towel.  Autolyse for 20 mins.
  3. 再次以中速(4) 攪拌至均勻,不需撐出薄膜。On medium speed, mix the dough again till even intensity.
  4. 滾圓,放入容器,進行第一次發酵,約需 4~5 小時。Round the dough and place it in a larger bowl. Let it ferment till double in size. It will take about 4~5 hours.
  5. 取出第一次發酵完成的麵糰,分成五等份,滾圓,鬆弛 10 分鐘。After the first fermentation, take the dough out from the bowl. Divide the dough into 5 equal portions. Round the dough and let it rest for 10 mins.
  6. 再次滾圓整形,然後放在烤盤上。Round the dough again and shape it. Then put it on the tray.
  7. 進行第二次發酵,約需1小時。Continue the second fermentation for about 1 hour.
  8. 烤箱預熱至220度C,約烤 18 分鐘。Preheat the oven to 220℃. Bake for about 18 mins.

【烤程/Oven Settings:Miele 6260 / Moisture Plus / Auto / 220℃
  1. 加濕功能/Moisture plus:Auto.
  2. 預熱至 220 度 / Preheat to 220℃.
  3. 麵糰放入烤箱,前5分鐘,先放層架3/For first 5 mins, put the dough on shelf 3.
  4. 烤 10 分鐘後,移至層架 2,降溫至 210 度C,續烤 8 分鐘左右。After baking for 10 mins, move to shelf 2. And turn down the temperature to 210℃. Continue baking for another 8 mins or so.


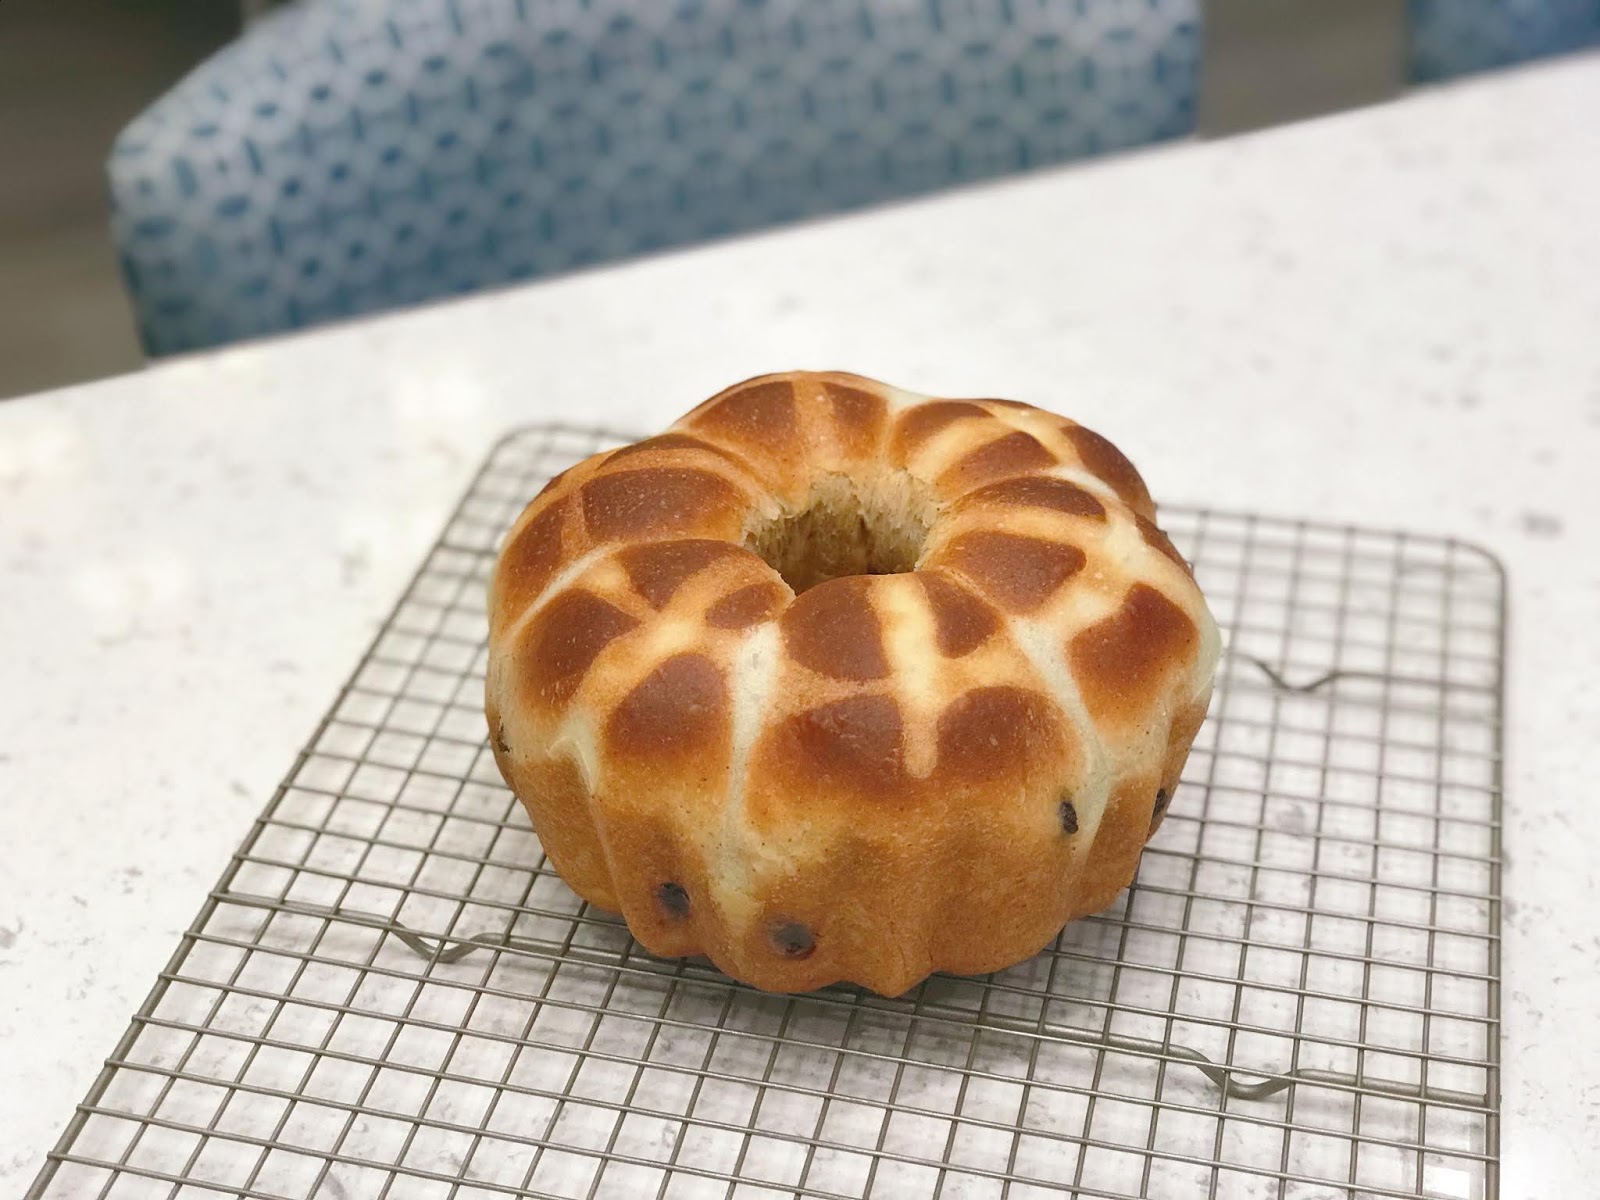
Hot Cross Buns


今日材料 / Today's Ingredients
  1. 高筋麵粉 / Bread Flour:220g
  2. 速發乾酵母 / Instant Yeast:2.5g
  3. 上白糖 / Sugar:16g 
  4. 肉桂粉 / Cinnamon powder:2t
  5. 蛋/Egg:1 個
  6. 鮮奶 / Milk:90g+
  7. 鹽 / Salt:3.5g
  8. 無鹽奶油 / Unsalted butter:16g
  9. 巧克力豆 / Chocolate chips:2T

【表面裝飾 / White Crosses
  1. 高筋麵粉 / Bread Flour:2T
  2. 水 / Water:Didn't measure today. Just add water and mix with the flour till sticky. Put the mixture into a plastic bag. Cut a small hole from the edge of the bag for squeezing the mixture to draw crosses.

【作法】KitchenAid 7Q Stand Mixer
  1. 材料 1~6 以低速攪拌,快成糰時,加入鹽。Mix ingredients 1~6 on low speed. While the dough is nearly formed, add salt.
  2. 在麵糰有些粗糙時,便可加入小塊小塊的奶油丁,分次加入,每次讓麵糰完全與奶油融合後,再加入奶油。Mix for another couple of minutes. When the dough looks rough, add butter cubes one at a time. After the dough and the butter are incorporated together, add the next butter cube.
  3. 打至撐出薄膜。
  4. If you are unsure if the dough has been kneaded enough, you can do the "windowpane" test. Remove a small bit of dough (about the size of a golf ball) and hold it between your thumb and first two fingers of each hand so the dough is in front of you. Then, gently pull your fingers and thumbs away from each other to stretch out the dough. If the dough doesn't break, it means you have kneaded it enough; if the membrane pulls apart, you need to knead it a bit more. (from: https://www.thespruceeats.com/kneading-dough-bread-baking-for-beginners-427562)
  5. 加入巧克力豆,慢速拌勻。Add chocolate chips and mix well by low speed.
  6. 滾圓,放入容器,進行第一次發酵,約2小時。 Round the dough and put it in a bowl. Cover with a wet towel. First rise till double in size.
  7. 取出第一次發酵完成的麵糰,分成 6 等份,滾圓,鬆弛 10 分鐘。Divide the dough into 6 equal portions. Round the dough, cover with a wet towel, and let it rest for 10 mins.
  8. 鬆弛後,每一份再滾圓,放入模具,六份都這樣做。進行第二次發酵,約30分鐘。After 10 mins, round every dough again and put it in the mold. Continue doing this for the rest of the dough. Then put the mold in wet and warm place to rise for 30 mins.
  9. 白麵糊畫十字線 / Draw crosses. 
  10. 烤箱預熱至210度C,約烤18分鐘。Preheat the oven to 210℃, bake for about 18 mins.

【烤程 / Baking Settings】  Miele 6260, Shelf 2
  1. 上下火預熱至 210 度C。Function: {Top/bottom heating}, preheat the oven to 210℃.
  2. 放層2。Put the mold on shelf 2.
  3. 10分鐘時先檢查麵包表面是否上色夠了,如夠了就蓋上鋁箔紙續烤。Around 10 mins, check the surface of the bread to see if it darkens enough. If it's already dark, cover the bread with foil and continue to bake.


2020年3月7日 星期六

五瓣花形麵包 II / Five Petals Floral Bread II


今日材料 / Today's Ingredients
  1. 高筋麵粉 / Bread Flour:220g
  2. 速發乾酵母 / Yeast:2.5g
  3. 日本和田製糖:上赤糖亞麻 / Sugar:16g (more information about this sugar, please go to: https://www.finebaking.tw/product/detail/89196)
  4. 肉桂粉 / Cinnamon powder:1t
  5. 香薑粉 / Ginger powder:1/2t
  6. 蛋/Egg:1 個
  7. 鮮奶 / Milk:110g+
  8. 鹽 / Salt:3.5g
  9. 無鹽奶油 / Unsalted butter:16g


【作法】KitchenAid 7Q Stand Mixer
  1. 材料 1~7 以低速攪拌,快成糰時,加入鹽。Mix ingredients 1~7 on low speed. While the dough is nearly formed, add salt.
  2. 在麵糰有些粗糙時,便可加入小塊小塊的奶油丁,分次加入,每次讓麵糰完全與奶油融合後,再加入奶油。Mix for another couple of minutes. When the dough looks rough, add butter cubes one at a time. After the dough and the butter are incorporated together, add the next butter cube.
  3. 打至撐出薄膜。
  4. If you are unsure if the dough has been kneaded enough, you can do the "windowpane" test. Remove a small bit of dough (about the size of a golf ball) and hold it between your thumb and first two fingers of each hand so the dough is in front of you. Then, gently pull your fingers and thumbs away from each other to stretch out the dough. If the dough doesn't break, it means you have kneaded it enough; if the membrane pulls apart, you need to knead it a bit more. (from: https://www.thespruceeats.com/kneading-dough-bread-baking-for-beginners-427562)
  5. 滾圓,放入容器,進行第一次發酵,約2小時。 Round the dough and put it in a bowl. Cover with a wet towel. First rise till double in size.
  6. 取出第一次發酵完成的麵糰,分成 5 等份,滾圓,鬆弛 10 分鐘。Divide the dough into 5 equal portions. Round the dough, cover with a wet towel, and let it rest for 10 mins.
  7. 鬆弛後,每一份再滾圓,放入模具,五份都這樣做。進行第二次發酵,約30分鐘。After 10 mins, round every dough again and put it in the mold. Continue doing this for the rest of the dough. Then put the mold in wet and warm place to rise for 30 mins.
  8. 烤箱預熱至210度C,約烤20分鐘。Preheat the oven to 210℃, bake for about 20 mins.

【烤程 / Baking Settings】  Bosch 8 series
  1. 上下火預熱至 210 度C。Function: {Top/bottom heating}, preheat the oven to 210℃.
  2. 放層2。Put the mold on shelf 2.
  3. 15分鐘時先檢查麵包表面是否上色夠了,如夠了就蓋上鋁箔紙續烤。Around 15 mins, check the surface of the bread to see if it darkens enough. If it's already dark, cover the bread with foil and continue to bake.

2020年3月6日 星期五

花形麵包 Floral Bread


今日材料 / Today's Ingredients
  1. 高筋麵粉 / Flour:220g
  2. 速發乾酵母 / Yeast:2.5g
  3. 日本和田製糖:本和香糖 / Sugar:16g
  4. 肉桂粉 / Cinnamon powder:1/2t
  5. 香薑粉 / Ginger powder:1/4t
  6. 鮮奶 / Milk:170g+
  7. 鹽 / Salt:3.5g
  8. 無鹽奶油 / Unsalted butter:16g


【作法】
  1. 材料 1~6 以低速攪拌,快成糰時,加入鹽。
  2. 在麵糰有些粗糙時,便可加入小塊小塊的奶油丁,分次加入,每次讓麵糰完全與奶油融合後,再加入奶油。
  3. 打至撐出薄膜。
  4. 滾圓,放入容器,進行第一次發酵,約2小時。
  5. 取出第一次發酵完成的麵糰,分成 4 等份,滾圓,鬆弛10分鐘。
  6. 鬆弛後,每一份再滾圓,放入模具,四份都這樣做。進行第二次發酵,約30分鐘。
  7. 烤箱預熱至210度C,約烤20分鐘。

{烤程}  Bosch 8 series
  1. 上下火預熱至 210 度C。
  2. 放層2。
  3. 15分鐘時先檢查麵包表面是否上色夠了,如夠了就蓋上鋁箔紙續烤。


櫻花原味戚風蛋糕 Cherry Blossom Chiffon Cake


今日材料 / Today's Ingredients】17cm 淺井加高模(這個模原配方是 4 顆蛋,我還是用 3 蛋的配方)/ 17cm Tall Chiffon Cake Mold. The original recipe for this mold is 4 eggs, but I like to use my 3 egg recipe. It works well for me.

Photo from https://store.shopping.yahoo.co.jp/asai-tool/al-sf-17t.html#&gid=itemImage&pid=1


蛋黃糊 / Egg Yolk Batter
  1. 蛋黃/Egg yolk:3 個
  2. 日本和田製糖:本和香糖/Sugar:22g(風味柔和,色澤乳白,甜度最高,礦物質少。這是比較和田製糖三種糖,分別是上赤糖亞麻、上赤糖琥珀、本和香糖。參考烘培木作坊網站。)Japan has a wide range of sugar. Different sugar has different scent, flavor, and sweetness. 
  3. 水/Water:25g
  4. 葵花籽油/Sunflower oil:30g
  5. 低粉/Cake flour:60g

鹽漬櫻花】用溫水濾過鹽分,然後將櫻花泡開,用餐巾紙壓乾櫻花,鋪平在模具底部。
Salt Pickled Sakura】 Rinse off the salt on Sakura blossoms. Then put Sakura blossoms in warm water till the petals are waving in the water. Put Sakura blossoms on paper tower and dry them. Arrange the blossom on the bottom of the mold.


蛋白霜 / Meringue
  1. 蛋白/Egg White:3 個
  2. 海藻糖/Sugar:45g (The sugar I use is less sweet and very delicate)
{How To} 打到 6 分發。KA 5Q 抬頭式攪拌機,速度 4。(KitchenAid 5Q Stand Mixer, speed 4 )
  1. 第一分鐘,打出粗泡,加入1/3 糖。(Whisk egg white for 1 min and add 1/3 of the sugar)
  2. 大約第二分鐘,再加入 1/3 糖。(Around after 2 mins add 1/3 of the sugar) 
  3. 大約第三分鐘,再加入剩下的糖。(Around after 3 mins add the rest of the sugar) 
  4. 這次共攪拌 6 分鐘。Beat till Medium SOFT peak. It took around 6 mins today.

混合蛋糕糊 / Mixing Egg Yolk Batter And Meringue
  1. 把 1/3 蛋白霜加入蛋黃糊中,輕拌均勻。(Scrape 1/3 of meringue and add to egg yolk batter. I will scrape  the outer part of the meringue. Then gently mix well.) 
  2. 再把 1 的混合物倒入剩下的蛋白霜中,輕拌均勻。(Then pour the mixer of 1. to meringue. Gently mix well. This should be done in 30 seconds if your meringue is in good soft condition.
  3. 把蛋糕糊倒入模具中,平整表面。(Pour the cake batter in the mold. )


烤程 / Baking Settings】  Bosch 8 series
  1. 上下火預熱至 180 度℃。(Preheat the oven to 180℃)
  2. 前十分鐘以烤表面為主,放層 3 。(I hope to bake the top surface of the cake for the first 10 mins, so I put the mold on shelf 3)
  3. 10 分鐘後取出畫線,溫度降為 170 度。(After 10 mins of baking, take the mold out and draw 6 lines on the top surface of the cake. Then put the mold back to oven but change to shelf 2, and decrease the temperature to 170℃)
  4. 將蛋糕模放層 2。
  5. 續烤 15 分鐘。(Continue baking for another 15 mins)


2020年3月4日 星期三

奶油吐司

之前做的液種奶油餐包還挺不錯的,今天沒有液種,就用直接法。


【材料】
  1. 高筋麵粉:250g
  2. 速發乾酵母:2.5g
  3. 日本和田製糖:上赤琥珀糖:20g(風味突出,色澤優雅,甜度適中,礦物質適中)
  4. 鮮奶:170g
  5. 冰塊水:20g(沒有秤,直接加進去麵糰一起打,視麵糰的狀況決定,冰塊水一點一點加入。)
  6. 鹽:4g
  7. 無鹽奶油:20g


【作法】
  1. 材料 1~5 以低速攪拌,快成糰時,加入鹽。
  2. 在麵糰有些粗糙時,便可加入小塊小塊的奶油丁,分次加入,每次讓麵糰完全與奶油融合後,再加入奶油。
  3. 打至撐出薄膜。
  4. 滾圓,放入容器,進行第一次發酵,約2小時。
  5. 取出第一次發酵完成的麵糰,分成 2 等份,滾圓,鬆弛10分鐘。
  6. 鬆弛後,每一份用擀麵棍擀平,寬度就是模具的寬度,然後捲起麵糰,放入模具,兩份都這樣做。進行第二次發酵,約30分鐘。
  7. 烤箱預熱至220度C,約烤20分鐘。

{烤程}  Bosch 8 series
  1. 上下火預熱至 220 度C。
  2. 放層2,今天放入麵糰後有降溫至 210 度。
  3. 10分鐘時先檢查麵包表面是否上色夠了,如夠了就蓋上鋁箔紙續烤。


櫻花戚風蛋糕 Cherry Blossom Chiffon Cake

雖底部有些地方美中不足,但柔軟的口感實在令人滿意!

【今日材料】七吋淺井加高模(這個模原配方是 4 顆蛋,我還是用 3 蛋的配方)

{蛋黃糊}
  1. 蛋黃:3 個
  2. 日本和田製糖:本和香糖:22g(風味柔和,色澤乳白,甜度最高,礦物質少。這是比較和田製糖三種糖,分別是上赤糖亞麻、上赤糖琥珀、本和香糖。參考烘培木作坊網站。)
  3. 水:25g
  4. 葵花籽油:30g
  5. 低粉:60g

{鹽漬櫻花} 用溫水濾過鹽分,然後將櫻花泡開,用餐巾紙壓乾櫻花,鋪平在模具底部。

{蛋白霜}
  1. 蛋白:3 個
  2. 海藻糖:45g
{How To} 打到 6 分發。KA 5Q 抬頭式攪拌機,速度 4。
  1. 第一分鐘,打出粗泡,加入1/3 糖。
  2. 大約第二分鐘,再加入 1/3 糖。
  3. 大約第三分鐘,再加入剩下的糖。 
  4. 這次共攪拌 5:30 分鐘。

{混合蛋糕糊}
  1. 把 1/3 蛋白霜加入蛋黃糊中,輕拌均勻。
  2. 再把 1 的混合物倒入剩下的蛋白霜中,輕拌均勻。
  3. 把蛋糕糊倒入模具中,平整表面。


{烤程}  Bosch 8 series
  1. 上下火預熱至 180 度C。
  2. 前十分鐘以烤表面為主,放層 3。
  3. 10 分鐘後取出畫線,溫度降為 170 度。
  4. 將蛋糕模放層2。
  5. 續烤 15 分鐘。
* 因為放進烤箱時撞到頂部,煙囪搖晃了一下,導致底部有一部分有凹陷,另一個可能則是櫻花沒有壓乾,太濕造成。


2020年3月3日 星期二

伯爵戚風蛋糕 Earl Grey Chiffon Cake


今天的伯爵戚風終於一掃之前洞孔太多的問題,原本一直以為是換烤箱惹的禍,其實是蛋白霜打太過的問題。


【今日材料】七吋淺井加高模(這個模原配方是 4 顆蛋,我還是用 3 蛋的配方)

{蛋黃糊}
  1. 蛋黃:3 個
  2. 上白糖:22g
  3. 水:30g
  4. 葡萄籽油:30g
  5. 低粉:50g

{紅茶醬}
  1. 日本娜麗茹卡伯爵紅茶粉:12g
  2. 溫水:38g~40g
  • 將紅茶粉與溫水攪拌均勻,備用。

{蛋白霜}
  1. 蛋白:3 個
  2. 海藻糖:45g
{How To} 打到 6 分發。KA 5Q 抬頭式攪拌機,速度 4。
  1. 第一分鐘,打出粗泡,加入1/3 糖。
  2. 大約第二分鐘,再加入 1/3 糖。
  3. 大約第三分鐘,再加入剩下的糖。 
  4. 這次共攪拌 5:20 分鐘。

{混合蛋糕糊}
  1. 把 1/3 蛋白霜加入蛋黃糊中,輕拌均勻。
  2. 再把 1 的混合物倒入剩下的蛋白霜中,輕拌均勻。
  3. 把蛋糕糊倒入模具中,平整表面。


{烤程}  Bosch 8 series
  1. 上下火預熱至 180 度C。
  2. 前十分鐘以烤表面為主,放層 3。
  3. 10 分鐘後取出畫線,溫度降為 170 度。
  4. 將蛋糕模放層2。
  5. 續烤 15 分鐘。


2020年3月2日 星期一

檸檬酵母液之培養

乾燥的檸檬片非常受歡迎,今天買了黃檸檬,綠萊姆,黃檸檬另有一種柚子的香氣,就一起烘乾吧!沒辦法切片的部分,可以用來培養檸檬酵母液。

【水果酵母液材料比例】
水果丁:水:糖=1:2:1/4

【作法】
  1. 混合所有材料,攪拌均勻,可蓋上保鮮膜,在膜上搓幾個洞,放置於溫暖處。
  2. 接下來的每一天早晚或想到時,就可以搖晃瓶子,讓材料混合。
  3. 慢慢的會有許多的泡泡產生,約 5~7 天泡泡會非常多,此時的酵母液已完成,可濾掉水果,把酵母液冷藏,或開始餵養水果種(所謂的天然酵母)。冷藏的酵母液可替代配方中的液體及酵母,比例和發酵時間需多嘗試。水果酵母液或剛開始以麵粉餵養的水果酵種帶有原水果香氣,很特別,餵養久後味道會消失(只剩發酵味),個人對長時間餵養的酵母沒有偏好,也不覺得它很厲害,反倒喜歡新鮮的水果風味。

可參考之前文章:


檸檬酵母液培養中


烘檸檬片

用食物乾燥機烘乾。
如果約 10 小時後才有空 check,可以用 50 度左右烘。
機器設定果乾是 58 度。這一批烘約 16 小時,最後才加溫到 58 度。


大姐新發明,茶葉+檸檬片,說超好喝!呵呵~


梵谷_不只是一個人的故事_Jo van Gogh-Bonger(約翰娜・梵谷-邦格)

Vincent 相信自己的藝術;Theo 相信 Vincent;Jo 相信 Theo 所相信的 Vincent。 而下一代 Vincent Willem,則把這份相信保存了下來。   photo  credit:  https://library.princeton.edu...