參考維基百科(https://zh.wikipedia.org/wiki/哲学之道)
|
2017年4月10日 星期一
京都哲學の道賞櫻
第一次去日本賞櫻,托老姐的福,一切都已安排好,我們只要傻傻地跟著。我們搭乘 JAL 的飛機去關西機場,老姐便在機場等候我們,然後帶我們去京都的飯店:平安之森(可惜是間服務不佳的旅館),算是在景點內的飯店,方便我們四處逛。我們一放好行李,便往「哲學の道」去賞櫻。
2017年4月7日 星期五
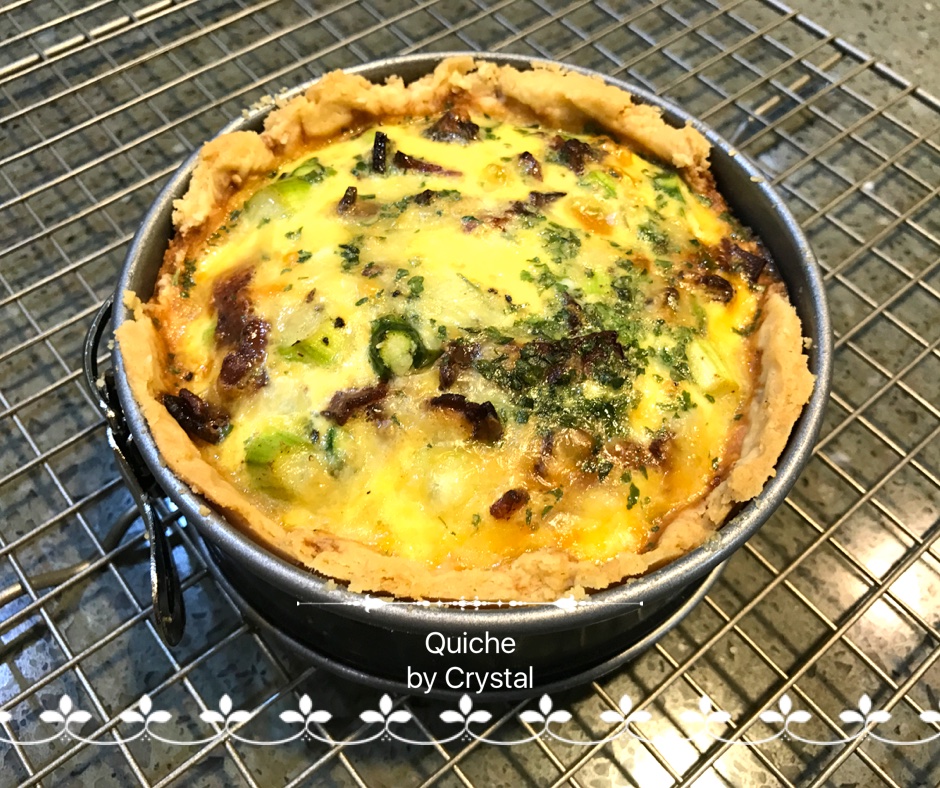
Quiche 手札 (Chef Steps)
參考 Chef Steps 做個筆記。
Quiche Base:https://www.chefsteps.com/activities/quiche-base
- 蛋:600g(兩個,100g)
- 全脂牛奶:400g(67g)
- 鮮奶油:120g(20g)
- 鹽:12g(2g )
- 黑胡椒:1g(少許)
- 豆蔻:0.5g(少許)
All Purpose Pie Crust:https://www.chefsteps.com/activities/pate-brisee
- 麵包粉:250g
- 奶油:205g(0.82)
- 鹽:3g
- 冰水:55g(0.22)
2017年4月6日 星期四
乳酪蛋糕 (Granola Bar 底)
記錄一下今天的乳酪蛋糕。表面如果撒上餅乾屑就是茅屋乳酪蛋糕。
【內餡】
【烤程】
150 度C烤 50 分鐘,190 度 10 分鐘上色。(原配方式 200 度上色,但是中間烤黑了,降至 190 度,下次可試試 180 度)。
![]() |
| 中間有些焦,因為溫度太高,下次試低溫一些。 |
![]() |
| 餡料好吃,已經是用 Granola Bar 當底, 口味不錯,但還是沒有很脆,下次應該 先塗一層蛋白再加起司糊,說不定會脆呢。 |
![]() |
| 這原本是做茅屋乳酪蛋糕的, 只要在表面撒上餅乾屑,就可以了。 |
【Crust(餅底)】七吋活動圓模
- Nature Valley Granola Bar:2 包
- 無鹽奶油:20g 左右
【內餡】
- Cream Cheese:250g
- 無鹽奶油:28g
- 糖:75g
- Sour Cream:110g
- 檸檬汁:2T
- 全蛋:91g(兩顆蛋,取出蛋白至 91g,全加也無所謂。)
- 玉米粉:8g
- 香草精:1t
【烤程】
150 度C烤 50 分鐘,190 度 10 分鐘上色。(原配方式 200 度上色,但是中間烤黑了,降至 190 度,下次可試試 180 度)。
2017年4月2日 星期日
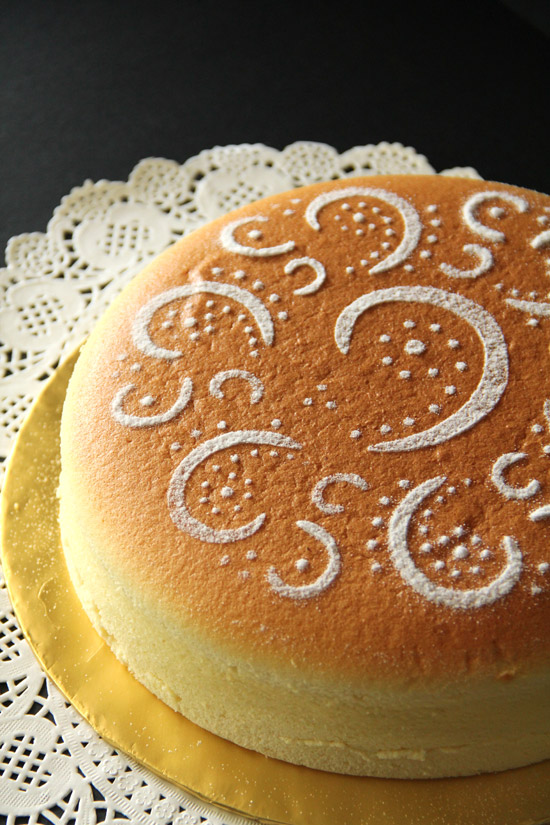
日式乳酪蛋糕手札
感覺上日式乳酪蛋糕是戚風蛋糕的一種,烤法不同完成的成品會有不同。此篇手札記錄「水浴法」做出來的日式乳酪蛋糕。
綜合各家做法,心得如下。
【我的材料】
{乳酪糊}
- Cream Cheese:125g
- 糖:24g
- 牛奶:50ml
- 無味植物油:35g
- 檸檬汁:2T
- 蛋黃:3 個
- 香草精:1/2t
- 低粉:50g
{蛋白霜}濕性發泡即可
- 蛋白:3 個
- 海藻糖:46g
- 檸檬汁:1t(不加也可以)
- 玉米粉:1/4t(最後一次加糖時一起加入,不加也可以)
【烤程】
水浴法,全部放層 1。150 度C烤 30 分鐘,130 度烤 70 分鐘。烤好時,烤箱門打開小縫,放涼 1 小時,再取出,用薄刀沿著圓模邊緣刮一圈,然後放在網架上放涼。完全涼後,放冰箱冷藏(有一說法最少冷藏 4 小時)。
Japanese Cheesecake III (Butter, Milk)
想試試這個配方的輕乳酪蛋糕,把它記下來。這個跟之前的差異在於這個是用無鹽奶油,之前的配方使用植物油,另外糖全加在蛋白霜這邊。配方差異不大,但這個使用牛奶,跟我最早做的同,口感應該更輕盈。重點:蛋白霜打到濕性發泡。
以下文章取自:http://rasamalaysia.com/japanese-cheesecake-recipe/2/
![]() |
| 圖片取自網站:http://rasamalaysia.com/japanese-cheesecake-recipe/2/ |
Cotton Soft Japanese Cheesecake Recipe
Makes 8″ or 9″ round tin | Prep Time: 30 mins | Bake Time: 70 mins
Adapted from: Diana’s Desserts and Little Teochew
Ingredients:
140g/5 oz. fine granulated sugar
6 egg whites
6 egg yolks
1/4 teaspoon cream of tartar
50g/2 oz. unsalted butter
250g/9 oz. cream cheese
100 ml/3 fluid oz. fresh milk
1 tablespoon lemon juice
60g/2 oz. cake flour /superfine flour
20g/1 oz. corn flour (cornstarch)
1/4 teaspoon salt
6 egg whites
6 egg yolks
1/4 teaspoon cream of tartar
50g/2 oz. unsalted butter
250g/9 oz. cream cheese
100 ml/3 fluid oz. fresh milk
1 tablespoon lemon juice
60g/2 oz. cake flour /superfine flour
20g/1 oz. corn flour (cornstarch)
1/4 teaspoon salt
- Cream cheese:250g(125g)
- 無鹽奶油:50g(25g)
- 牛奶:100ml(50ml)
- 低粉:60g(30g)
- 玉米粉:20g(10g)
- 鹽:1/4t(1/8t)
- 蛋黃:6 個(3 個)
- 檸檬汁:1T(1/2T)
- 蛋白:6 個(3 個)
- 糖:140g(70g)
- 塔塔粉不加
***我習慣做三顆蛋***
Method:
1. Melt cream cheese, butter and milk over a double boiler. Cool the mixture. Fold in the flour, the cornflour, salt, egg yolks, lemon juice and mix well. (隔水加熱乾酪、奶油、牛奶,放涼,加入低粉、玉米粉、鹽、蛋黃、檸檬汁,攪拌均勻)
2. Make the meringue by whisking egg whites with cream of tartar until foamy. You can beat with a stand mixer or handheld mixer. Add in the sugar and whisk until soft peaks form. (Click on the link to see image of how the meringue should look.) (蛋白霜打到濕性發泡)
![]() |
| 圖片取自網路:http://www.craftpassion.com/wp-content/uploads/2012/02/Make-Cranberries-Lemon-Zest-Steam-Sponge-Cake-3.jpg |
3. Take 1/3 meringue and fold into the cheese mixture, then fold in another 1/3 of meringue. After incorporated, pour the batter back to the remaining 1/3 meringue and fold. FOLD GENTLY. Pour the mixture into a 8-inch round cake pan (lightly grease and line the bottom and sides of the pan with grease-proof baking paper or parchment paper).(把 1/3 蛋白霜加入乳酪糊,輕輕拌勻,然後再加入 1/3 蛋白霜到乳酪糊,輕輕拌勻,最後把乳酪糊倒入剩下的蛋白霜,輕輕拌勻,然後倒入八吋圓模)
4. Bake cheesecake in a water bath for 1 hours 10 minutes or until set and golden brown at 160 degrees C (325 degrees F). (水浴烤法,160 度C烤 70 分鐘,或至金黃色)
Cook’s Notes:
1. I baked the cake in 9″ round tin, did not line the sides.
2. If you use a 8″ pan, it is very important to line the sides of the 8″ pan with parchment paper, make sure the parchment paper extends higher than the cake tin by about 1.5″.
3. If springform pan or loose base cake tin is used, wrap the base of your cake tin with 2 layers aluminium foil, to prevent seepage.
4. I baked the cake on the lowest shelf in the oven (to prevent cracks on top and over browning).
5. The purpose of using double boiler is to melt the cheese, butter, and milk mixture. I heated and simmered the water in the double boiler ON the stove. For the water bath, I used hot water.
6. I left the cake to cool down in the oven with the oven door open, about an hour. This is to prevent sudden change of temperature that may cause the cake to shrink drastically. It’s normal that the cake will shrink about ½ inch to 1 inch after cooling, it’s normal. If the cake shrinks a lot, the main reason is over mixing the egg white mixture with the cheese mixture. Beat the egg whites until soft peaks form, FOLD VERY GENTLY, do not stir or blend.
7. Refrigerate the cake (with or without the cake tin) for at least 4 hours or overnight
2017年4月1日 星期六
乳酪蛋糕 (塔皮)
參考網站做法,以塔皮來做乳酪蛋糕,以熱烤方式完成,別有一番味道!
以下文章取自:
https://www.keyingredient.com/recipes/3141295032/lemon-bar-cheesecake/utm_source=from_pinterest_overlay_m
![]() |
| 圖片取自:https://www.keyingredient.com/recipes/3141295032/lemon-bar-cheesecake/utm_source=from_pinterest_overlay_m |
Ingredients
- CHEESECAKE:
- 2cups all-purpose flour(240g)
- ½cup powdered sugar(100g)
- ¼teaspoon salt(4g
- ½cup cold butter, cubed(113g)
- 2egg yolks
- 1 to 2tablespoons ice-cold water
- 4(8-ounce) packages cream cheese, softened
- 1cup granulated sugar
- 4large eggs
- 2teaspoons vanilla extract
- 2cups Quick and Easy Lemon Curd, divided
- Candied lemon slices
- QUICK AND EASY LEMON CURD:
- 6lemons
- ½cup butter, softened
- 2cups sugar
- 4eggs
- CANDIED LEMON SLICES:
- 2small lemons
- 1cup sugar
- 2tablespoons fresh lemon juice
- ¾cup water
Directions
CANDIED LEMON SLICES
Cut lemons into 1/8-inch-thick rounds; discard seeds. Stir together sugar, lemon juice, and water in a large skillet over medium heat until sugar is dissolved. Add lemon slices, and simmer gently, keeping slices in a single layer and turning occasionally for about 14 to 16 minutes or until slightly translucent and rinds are softened. Remove from heat.
Place slices in a single layer in a wax paper-lined jelly-roll pan, using tongs. Cool completely, about 1 hour. Cover and chill 2 hours to 2 days. Reserve syrup for another use.
FOR LEMON CURD
Grate zest from lemons to equal 2 tablespoon. Cut lemons in half; squeeze juice into a measuring cup to equal 1 cup.
Beat butter and sugar at medium speed with an electric mixer until blended. Add eggs, 1 at a time, beating just until blended after each addition. Gradually add lemon juice to butter mixture, beating at low speed just until blended after each addition; stir in zest. Mixture will look curdled. Transfer to a 3-qt. microwave-safe bowl.
Microwave at HIGH 5 minutes, stirring at 1-minute intervals. Microwave, stirring at 30-second intervals, 1 to 2 more minutes or until mixture thickens, coats the back of a spoon, and starts to mound slightly when stirred.
Place heavy-duty plastic wrap directly on warm curd (to prevent a film from forming), and chill 4 hours or until firm. Store in an airtight container in refrigerator up to 2 weeks.
Stove-Top Method: Prepare as directed and transfer mixture to a heavy 4-qt. saucepan, instead of a microwavable bowl. Cook over medium-low heat, whisking constantly, 14 to 16 minutes. Place in a bowl and cover with heavy-duty plastic wrap and chill 4 hours or until firm.
CHEESECAKE
Pulse flour, sugar and salt in a food processor 3 or 4 times or just until blended. Add butter, and pulse 5 or 6 times or until crumbly. Whisk together egg yolks and 1 tablespoon ice-cold water in a small bowl; add to butter mixture, and process until dough forms a ball and pulls away from sides of bowl, adding up to 1 tablespoon remaining ice-cold water, 1 teaspoon at a time, if necessary. Shape dough into a disk; wrap in plastic wrap. Chill 4 to 24 hours.
Roll dough into a 14-inch circle on a lightly floured surface. Fit dough into a lightly greased 9-inch dark springform pan, gently pressing on bottom and up sides of pan; trim and discard excess dough. Chill 30 minutes.
Meanwhile, preheat oven to 325°. Beat cream cheese at medium speed with an electric mixer 3 minutes or until smooth. Gradually add granulated sugar, beating until blended. Add eggs, 1 at a time, beating just until yellow disappears after each addition. Beat in vanilla.
Pour two-thirds of cheesecake batter (about 4 cups) into prepared crust; dollop 1 cup lemon curd over batter in pan, and gently swirl with a knife. Spoon remaining batter into pan.
Bake at 325° for 1 hour to 1 hour and 10 minutes or just until center is set. Turn oven off. Let cheesecake stand in oven, with door closed, 15 minutes. Remove cheesecake from oven, and gently run a knife around outer edge of cheesecake to loosen from sides of pan. (Do not remove sides of pan.) Cool completely in pan on a wire rack (about 1 hour). Cover and chill 8 to 24 hours.
Remove sides of pan, and transfer cheesecake to a serving platter. Spoon remaining 1 cup lemon curd over cheesecake, and, if desired, top with Candied Lemon Slices.
調整後材料:
【Crust(餅底)】七吋活動圓模
- 中筋麵粉:120g
- 糖:50g
- 鹽:2g
- 無鹽奶油:55g
- 蛋黃:1個
- 冰水:1T
【內餡】
- Cream Cheese:250g
- 無鹽奶油:28g
- 糖:75g
- Sour Cream:110g
- 檸檬汁:2T
- 全蛋:91g(兩顆蛋,取出蛋白至 91g,全加也無所謂。)
- 玉米粉:8g
- 香草精:1t
Quiche Toast Cups
這是參考網站做的【吐司杯】,小孩很喜歡。做法簡單,只是需要一些準備工作。
![]() |
| 照片取自網站:http://www.recipetineats.com/quiche-toast-cups/ |
QUICHE TOAST CUPS
PREP TIME
COOK TIME
TOTAL TIME
Cute mini quiches made using plain old sandwich bread. Who can possibly resist these? Makes 6 quiches (3 servings).
Author: Nagi | RecipeTin Eats
Recipe type: Breakfast, Brunch, Snack, Finger Food
Serves: 3
INGREDIENTS
- 1 rasher of bacon, rind removed, diced (50g / 1.5 oz)
- ¼ onion, finely diced (brown, white or yellow)
- 1 tsp oil
- 6 slices white sandwich bread (fresh)
- 2 regular size eggs (or 3 small)
- ⅔ cup milk
- ⅓ cup cheese, grated (tasty, gruyere, cheddar - any good melting cheese)
- 2 tsp parsley, finely chopped
- Salt and pepper
- Oil spray
INSTRUCTIONS
- Preheat oven to 180C/350F.(烤箱預熱至 180 度C)
- Heat 1 tsp oil in small pan over high heat. Add onion and bacon and sauté until bacon is crisp - about 2 minutes. Remove from heat and set aside (you can just leave it in the pan).(炒洋蔥、培根)
- Cut bread into rounds or just cut crusts off. I use a 800g/28oz tomato can (emptied and washed) - the perfect size to cut rounds to fit into muffin tins out of bread, pastry etc.(吐司壓出圓形)
- Use a rolling pin to flatten the bread.(桿平吐司)
- Lightly spray 6 muffin tin holes with oil spray, then press the bread into the muffin tin.(馬芬模噴烤盤油,將圓形吐司壓入馬芬模)
- Place in oven for 3 minutes. Remove from oven and set aside. The toast cups should not be browned, just a bit dry (like "toast").(放入烤箱烤 3 分鐘)
- Whisk together the egg, milk, parsley and a pinch of salt and pepper.(混合蛋、牛奶、西洋芹、鹽、胡椒)
- Divide the bacon mixture between the 6 toast cups, then the cheese.(餡料先放入吐司杯)
- Pour 2½ tbsp of egg mixture into each cup, then immediately place in the oven. If you take too long between pouring the egg mixture into the toast cups and putting it in the oven, the egg will start soaking into the bread.(再加入蛋奶醬,加完迅速放進烤箱,吐司杯才不會被蛋奶醬弄糊)
- Bake for 12 to 15 minutes until the top is lightly golden and the filling is set.(烤12~15分鐘至金黃色)
- Remove from oven and rest for 5 minutes before serving. The filling will be puffed up but it will deflate while resting.(取出靜置5分鐘,餡料會回縮)
- Garnish with extra parsley if desired. Serve warm.(表面可再裝飾西洋芹)
NOTES
1. This recipe does not work with stale bread because you cannot flatten it and when you try to mould it into the muffin tray, it will crumble. Trust me - I tried.
2. The purpose of popping the toast cups into the oven for a few minutes is to dry the bread out a bit so it doesn't soak up the egg mixture. The bread should not brown so it doesn't matter if the oven is not quite up to 180C/300F when you put the toast cups in.
| 今天做的,的確受歡迎! |

藍莓戚風蛋糕
{蛋黃糊}
- 蛋黃:3 個
- 素焚糖:10g
- 藍莓罐頭液體:20g
- 檸檬汁:1T
- 香草精:1/4t
- 葡萄籽油:30g
- 特級紫羅蘭低筋麵粉:60g
{蛋白霜}
- 蛋白:3 個
- 海藻糖:45g
- 糖可分三次加入。第一次於打出粗泡時,第二次打至顏色變淡,但不挑起任何尖角,第三次為打至有微微尖角。蛋糕捲之蛋白霜可打到 6、7 分即可。
{餡料}
***不太甜的蛋糕,可以在表面撒上糖粉,或上糖霜,或淋上藍莓醬。***
- 藍莓果粒:2T
***不太甜的蛋糕,可以在表面撒上糖粉,或上糖霜,或淋上藍莓醬。***
2017年3月30日 星期四
Blueberry Cheesecake
2017年3月28日 星期二
Cheese Cake 詳細解說
這個網站有 cheese cake 詳細解說,記錄下來!
http://www.thekitchn.com/how-to-make-perfect-cheesecake-recipe-cooking-lessons-from-the-kitchen-110760
The Best Kind of Cream Cheese to Use
Let's talk for a minute about the cream cheese — a very important ingredient in cheesecake. Some people have brand loyalty to Philadelphia, and I won't deny that this cream cheese makes a particularly silky and lush cheesecake. I've also made cheesecakes with local brands and off brands and been perfectly happy.
No matter what, buy full-fat cream cheese. Cheesecake is not the time to skimp.
不管用什麼品牌,買全脂的A Cheesecake Needs More than Cream Cheese
But as delicious as cream cheese is, it needs some helpers to become a tasty cheesecake. Most recipes either use heavy cream or sour cream; either will do the job of softening the texture of the cheese and adding some moisture. Personally, I prefer sour cream because I like the extra hit of sour tang it adds to the cake.
個人喜歡加酸奶
You also need a few eggs to hold the cake together. Three whole eggs do the trick quite nicely. I also add an extra yolk, which enhances the cake's velvety texture. (Whites tend to lighten the cake, which is actually fine — if you don't feel like separating that fourth egg and don't mind some extra airiness in the texture, just add in the whole egg.
多一顆蛋黃可增加柔密口感,也可不加Starch Adds Insurance
A little bit of cornstarch or flour in the cheesecake batter is insurance against cracking and makes the cake easier to cut into clean slices, though it does change the texture of the cheesecake a bit. Starch makes the cheesecake more firm and sturdy, while a cheesecake that relies on eggs alone has a softer, super-creamy texture.
I have tried both and love both. I feel like the texture difference is actually quite slight — it might be noticeable in a side-by-side comparison, but it would take a true cheesecake connoisseur to distinguish one on its own. Go whichever route makes you happiest.
加了玉米粉可以讓起司蛋糕比較不會裂,亦可讓蛋糕切來更乾淨俐落
A Water Bath Makes Cheesecake Extra Creamy
A water bath isn't strictly needed if you use starch in your recipe, and there are some methods for cooking even a starchless cheesecake on its own, but I still stand by this method. A water bath helps cook the cheeseake oh so gently while also creating a steamy environment so the surface doesn't get too dry. It's like a day spa for the cheesecake, and makes it supremely smooth and creamy.
A water bath is also not that hard. Just set the cheesecake in a roasting pan or other large baking dish, fill it with a few inches of water, and put the whole contraption in the oven. Wrapping the cheesecake pan in foil also helps keep any water from seeping through the cracks of the pan.
個人喜歡水浴烤法Preventing Cheesecake Cracks
There are two main reasons why your cheesecake might form cracks: Overcooking and too-fast cooling. Both are entirely preventable. Cook your cheesecake until the outer ring of the cake is slightly puffed and fairly firm, but the inner circle still jiggles like barely set Jell-o. A few toasty golden spots are fine, but if you see any small cracks forming, immediately move on to the cooling step.
過度烘烤和冷卻過快會造成龜裂
When cooling, do it gradually. Let the cheesecake sit in the turned-off oven with the door cracked for about an hour, then remove it from the water bath and let it cool completely on the stovetop. When you remove it from the waterbath, also run a thin-bladed knife around the edge to make sure the cake isn't sticking to the pan, which can also cause cracks as the cake settles.
水浴法烤完,關掉烤箱,把烤箱門打開,讓蛋糕在烤箱裡冷卻 1 小時,之後放到檯面上,用薄刀片把蛋糕周圍繞一圈,確保不回在龜裂,然後讓蛋糕完全冷卻好再冰冰箱Always (Always) Chill a Cheesecake
A cheesecake is a make-ahead cake in the sense that you have to make it ahead. After all the careful baking and slow cooling, the cheesecake still needs to chill in the fridge and finish setting up for at least four hours or (ideally) overnight.
If you cut into the cheesecake before chilling, it will have a firm custardy texture, like flan, and you will think that you've done something terribly wrong. But afterchilling, it will have transformed into that velvety, creamy, lush cheesecake that we all know and love. It's like magic.
起司蛋糕一定要冷藏最少四小時4 Things You Shouldn't Worry About
There are a few moments in this process when you may think that all is lost. I want to set your mind at ease.
- Tiny bits of cream cheese in the batter: Sometimes you get some little specks of cream cheese in the batter that won't go away — either because your cream cheese was still a bit chilly or because of the cream cheese itself (cream cheese with fewer additives tends to incorporate less easily into the batter, surprisingly). You don't want large lumps, but these tiny speckles are fine. They will melt into the cheesecake as it bakes and won't affect the finished cake.
- A few cracks: Yes, sometimes you'll get cracks in your cheesecake. It happens — usually if you accidentally cooked the cheesecake a little too long or cooled it too quickly. But a few cracks don't mean you failed or that your cheesecake is ruined. Just cover it with topping and carry on.
- A little water in the pan: Oh, no! Did a little water work its way through the foil and leak into your pan? Don't worry about it. The outside edge of your crust will look a bit soggy at first, but it will set up in the fridge overnight with none the wiser. Promise.
- Wrong pan size: If you only have a 10-inch pan and you want to make a recipe for a 9-inch cheesecake, it's fine to use the pan you have. Changing the pan size when making cheesecake will affect the height of the cheesecake and its cooking time (thinner cheesecakes will cook a bit more quickly), but not its flavor or texture.
Instructions
- Preheat the oven and warm the cream cheese: Preheat the oven to 350°F with a rack in the lower-middle position. Take the blocks of cream cheese out of their boxes and let them warm on the counter while you prepare the crust, about 30 minutes.
- Rub the pan with butter: Use your fingers to rub a small pat of butter all over the bottom and sides of the pan.
- Wrap the pan in foil: Cut two large pieces of foil and lay them on your work surface in a cross. Set the springform pan in the middle and fold the edges of the foil up around the sides of the pan. The foil gives you extra protection against water getting into the pan during the water bath step.
- Prepare the crust: Crush the graham crackers in a food processor (or in a bag using a rolling pin) until they form fine crumbs — you should have 1 1/2 to 2 cups. Melt 5 tablespoons of butter in the microwave or on the stovetop and mix this into the graham cracker crumbs. The mixture should look like wet sand and hold together in a clump when you press it in your fist. If not, add extra tablespoons of water (one a time) until the mixture holds together. Transfer it into the springform pan and use the bottom of a glass to press it evenly into the bottom. (For step-by-step instructions of this step, see How to Make a Graham Cracker Crust.)
- Bake the crust: Place the crust in the oven (be careful not to tear the foil). Bake for 8 to 10 minutes until the crust is fragrant and just starting to brown around the edges. Let the crust cool on a cooling rack while you prepare the filling.
- Mix the cream cheese, sugar, cornstarch, and salt: Combine the warmed cream cheese, sugar, cornstarch, and salt in the bowl of a stand mixer fitted with a paddle attachment (or use a handheld mixer). Mix on medium-low speed until the mixture is creamy, like thick frosting, and no lumps of cream cheese remain. Scrape down the beater and the sides of the bowl with a spatula.
- Mix in the sour cream, lemon juice, and vanilla: Add the sour cream, lemon juice, and vanilla to the bowl and beat on medium-low speed until combined and creamy. Scrape down the beater and sides of the bowl with a spatula.
- Mix in the eggs and yolk one at a time: With the mixer on medium-low speed, beat in the eggs and the yolk one at a time. Wait until the previous egg is just barely mixed into the batter before adding the next one. At first, the mixture will look clumpy and broken, but it will come together as the eggs are worked in.
- Stir a few times by hand: Scrape down the beater and sides of the bowl with a spatula. Stir the whole batter a few times by hand, being sure to scrape the bottom of the bowl, to make sure everything is incorporated. The finished batter should be thick, creamy, and silky. Don't worry if you see a few specks of un-mixed cream cheese here and there; they will melt into the batter during baking and won't affect the finished cheesecake.
- Pour the batter over the cooled crust: Check to make sure the crust and the sides of the pan are cool — if they're cool enough to comfortably touch, you can go on. Pour the batter over the cooled crust and spread it into an even layer against the sides of the pan.
- Transfer the pan to the water bath: Transfer the pan to a roasting pan or other baking dish big enough to hold it. Bring a few cups of water to a boil and pour the water into the roasting pan, being careful not to splash any water onto the cheesecake. Fill the pan to about an inch, or just below the lowest edge of foil.
- Bake the cheesecake: Bake the cheesecake at 350°F for 50 to 60 minutes. Cakes baked in a 10-inch pan will usually cook in 50 to 55 minutes; cakes in a 9-inch pan will cook in 55 to 60 minutes. The cheesecake is done when the outer two to three inches look slightly puffed and set, but the inner circle still jiggles (like Jell-o) when you gently shake the pan. Some spots of toasted golden color are fine, but if you see any cracks starting to form, move on to the next step right away.
- Cool the cheesecake in the oven: Turn off the oven and crack the door open. Let the cheesecake cool slowly for one hour.
- Run a knife around the edge of the cake and cool the cake completely: After an hour, remove the cheesecake from the oven and from the water bath, unwrap the foil, and transfer it to a cooling rack. Run a thin-bladed knife around the edge of the cake to make sure it's not sticking to the sides (which can cause cracks as it cools). Let the cheesecake cool completely on the rack.
- Chill the cheesecake for four hours in the refrigerator: Chill the cheesecake, uncovered, for at least four hours or up to three days in the refrigerator. This step is crucial for letting the cheesecake set and achieving perfect cheesecake texture — don't rush it.
- Top the cheesecake and serve: Take the cheesecake out of the fridge about 30 minutes before you plan to serve. Unmold the cake and top the cheesecake just before serving. You can serve the cake right from the bottom of the springform pan, or use a large off-set spatula to gently unstick the crust from the pan and transfer it to a serving platter. Leftovers will keep, uncovered and refrigerated, for several days.
2017年3月26日 星期日
巧克力舒芙蕾
【今日材料】
- 牛奶:100ml
- 蛋黃:1 個
- 糖:10g
- 低粉:7g
- 巧克力醬:1T
{蛋白霜}
- 蛋白:1個
- 海藻糖:13g
***模具先均勻上奶油後,再均勻地滾上粗糖,先放冰箱冷藏。
***Miele 上下火預熱至 180 度,放入後降至 160 度,今天烤 30 分鐘。
訂閱:
文章 (Atom)
Monet to Matisse: Defying Tradition_p66_Whistler 惠斯勒
James Abbott McNeill Whistler 詹姆斯・阿博特・麥克尼爾・惠斯勒,1834–1903 James Abbott McNeill Whistler 詹姆斯・阿博特・麥克尼爾・惠斯勒 1834 年生於美國麻薩諸塞州洛威爾 1903 年卒於英國倫敦 Cre...
-
⭐ 怎麼看出 bulk fermentation(第一次發酵) 可以再少一些? 根據 成品,有 三個訊號判斷: 1️⃣ 外觀:側邊略微「向外開」而不是往上挺 代表: 整形張力有建立 但麵糰已經發展到接近飽和 烘烤前的最後發酵只需要一點點就會到頂 👉 這通常是 bulk 偏滿(...
-
🍞 佛卡夏基本比例(以麵粉 100% 為基準) 材料 百分比( baker’s % ) 高筋麵粉(或中筋也可) 100% 水 70% (偏濕潤、孔洞較大) 鹽 2% 速發酵母 0.5–1% ...